

4. EXPERIMENTAL PROCEDURE
4.1. Calibration of Oxybaby
The method chosen to measure what percentage of carbon dioxide in the air, is the use of the measuring device called Oxybaby.
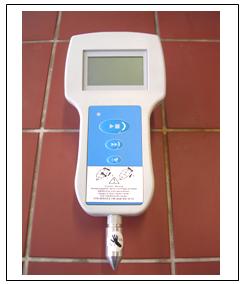
Figure 4.1: Oxybaby.
Oxybaby is a portable instrument; wireless, to measure the amount of O2 and CO2 that is inside the column. This measurement has a range from 0 to 100 Vol% of carbon dioxide and oxygen. The percentage of gas volumes are not combustible.
Its use is simple and relatively comfortable. It is relatively easy because this device can not be wet, because the readings are wrong with the presence of water and also breaks down the team. If there is any measurement point where there is presence of water, should solve the problem, but because at that same point can not be read.
The power supply of the device is through high quality rechargeable batteries, in case the device does not have enough battery, then marked on the screen. In these two cases need to connect it with the loader, in order to charge the batteries. The loop device is built by a small bomb, a quantity of sample gas, which makes a comparison with values previously recorded as reference patterns. The leads to the cell of oxygen and carbon dioxide. The measurement of CO2 is based on the principle of infrared absorption.
This has an automatic pressure compensation. That ensures reduce measurement errors due to the difference in pressure, the environment or the sites of measurement.
After the reading, the device stored the reading in a file automatically, the value obtained from CO2 and O2, along with the date and time the sample quickly.
Operating instructions.
The Oxybaby has two models of operation are as follows: Simple-Hold measurement and continuous measurements, described later.
Before using the device must first recharge the batteries for two hours.
- Open and close protection of the needle.
We recommend opening the protection of the needle just before measure and closing it directly once finished the reading.

Figure 4.2: Protection of the needle.
To open the protection to be careful because the needle leaves off and if not done carefully can stick in hand. First flip the protection turn clockwise a quarter turn, then push inwards and at the same time left to turn back a quarter turn.
To close protection, to hide the needle, you have to rotate a quarter turn clockwise and destenciona already down.
- Start:
The connection of the team is pressing the button![]() . The screen displays the software version, and serial number of your scanner. Below are the last measure appears indicating the concentration of oxygen and carbon dioxide, along with the time and date of measurement made.
. The screen displays the software version, and serial number of your scanner. Below are the last measure appears indicating the concentration of oxygen and carbon dioxide, along with the time and date of measurement made.

Figure 4.3: Oxybaby.

Figure 4.4: Initial screen of Oxybaby.
1- Date.
2- Time.
3- Battery level.
- Access menu:
Within the menu you have several options, for access to press![]() .
.
*Choose the method of functioning:![]() . Click
. Click![]() , to change the model, click on
, to change the model, click on![]() , once the desired model is chosen ton with the menu button
, once the desired model is chosen ton with the menu button![]() .
.
-
Sample-Hold: method used to measure the concentration of CO2 and O2, at a point of measurement for 15 seconds. Once read, the values are stored automatically with the date and time of completion.
If you want to increase the reading time can be done by pressing
.
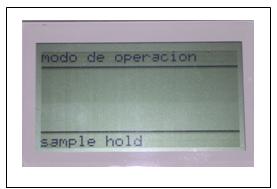
Figure 4.5: Screen operation model (1).
-
Continuum: method for reading followed CO2 and O2 concentration, the point of measurement values are automatically saved in a file every 10 seconds. The measure is to always pressing with
 .
.
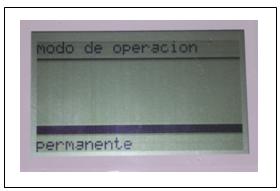
Figure 4.6: Screen operation model (2)
* Change the time and date:
Is the next screen that appears after choosing the method of operation. At the bottom of the screen shows the date and time. To confirm that you want to make a change must press![]() .
.
To choose the next figure![]() indicated when the correct day, the data confirmwith
indicated when the correct day, the data confirmwith ![]() . To go to the menu as pressing
. To go to the menu as pressing![]() .
.

Figure 4.7: Display date and time
* Calibration:
You should bear in mind that there are four points calibration to be performed as follows.
-
0,0% O2 :To make the 0% oxygen must connect the device to an output of N2. The output of N2 is in the chemistry laboratory instrumental EPSEM.

Figure 4.8:Location of the output of N2 in the chemical laboratory of the instrumental EPSEM.
Starting with the measure button
To continue to press the calibration
and to return to menu
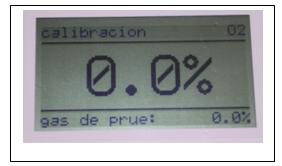
Figure 4.9: Screen calibration 0,0% O2.
-
20,9% O2:The calibration is done with the free air. To start the calibration button
. While the screen is flashing that means the device is measuring. The value of returns filed and screen out 20.9%.
To continue to press the calibration

Figure 4.10: Screen calibration 20,9%O2 .
-
0,0% CO2 : Should a gas gauge that does not contain zero CO2, therefore re-use the N2.
Starting with the measure button
To continue to press the calibration

Figure 4.11: Screen calibration 0,0% CO2 .
- 100% CO2 : Connect the equipment into an outlet gas test, of CO2 100%.
Starting with the measure button
Press to return to menu

Figure 4.12: Screen calibration 100,0% CO2.
*Language:
Here you can choose the language in which you want to operate the device (German, English, French, Spanish, Italian, Netherlands, Polish, Finnish, Swedish, Russian and Japanese). To confirm that you want to do a modified push![]() .
.
At the bottom of the screen shows the current language and the language is displayed on a line with the black button ![]() you can choose another language. To confirm click button
you can choose another language. To confirm click button ![]() .
.
Press to return to menu![]() .
.

Figure 4.13: Display language.
- Making a measurement:
Place the measuring device in the desired sampling point of the column, initially be open on the protection of the needle.
Click ![]() and wait 15 seconds to do the reading.
and wait 15 seconds to do the reading.

Figure 4.14: Examples of sampling in POINT 1, POINT 2 AND POINT 3.
- Turn the device:
To put it simply press the button for 3 seconds![]() and make sure that the needle is protected by the protection.
and make sure that the needle is protected by the protection.

Figure 4.15: Protection of the needle.